Tuesday, February 28, 2012

Liebster Blog Award

Yesterday, I was honored to be awarded with the Liebster Blog Award from Lindsey over at Todd & Lindsey. They have fantastic recipes, crafts, and home improvement ideas on their cute blog.  Thanks so much Todd and Lindsey!

What the heck is a Liebster Blog Award?

A Liebster Blog Award is given to talented and loved bloggers who have less than 200 followers.


Just a few rules:
Thank your Liebster Blog Award presenter on your blog.
 Link back to the blogger who presented the award to you.
 Copy and paste the blog award on your blog.
 Present the Liebster Blog Award to 5 blogs of 200 followers or less who you feel deserve to be noticed. Let them know they have been chosen by leaving a comment at their blog.

Here are the five up-and-coming blogs that I have chosen to receive this award (in no particular order):


Go check out these awesome blogs. You will be so glad you did.

Thanks ladies for all your inspiration! Pass on the blog love!


I joined a Bloglovin' Blog Hop! Click on the link below for more details!!

Wednesday, February 22, 2012

Making Pictures Pop

I love white. Sometimes I want to paint everything in my house white. But then, nothing would stand out. It would be kind of blah.

About a year ago, I did a project with board and batten on this wall. I painted it white, and then added three framed black and white pictures of my kiddos above it. The wall behind it is an off white color. I wanted to paint it, but it extends all the way down the stairs into the front entrance, which wouldn't look good in any of the colors I liked, so that option was out.
It looked okay, but it needed a pop of color.

This week, I figured out a way to make the pictures stand out without painting the entire wall. Since my frames are square, I just painted a larger square on the wall behind them.

First, I used a level and a pencil to mark where the edges would be and to make sure my lines were straight:

Then I taped off the wall:

I wanted to use the same color paint as the rest of the room, but I didn't have any of that paint left, so I used my highly technical paint mixing skills (e.g. a little of this and a little of that) to whip up a color that was very similar. It looks very gray here (photo taken at night), but it's actully a blue/gray. 

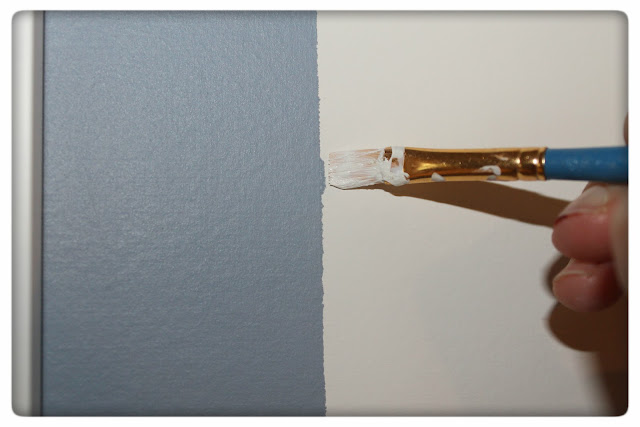
The paint bled a through the tape a little, so I touched it up with a small painter's brush:


I'm so much happier with the way the pictures pop out now against the white wall. Small project = big improvement!

Linking up with:

Measured by the Heart

Fine Craft Guild The Girl Creative
Funky Junk's Sat Nite Special

Friday, February 17, 2012

Thrift Store Friday

It's Friday again!  I went to a different thrift store today. It's a little mom and pop place out in the country. They had the cutest things. I found this vintage wash board for $9. I think I'll hang it right outside my laundry room.


Have a great weekend! 


P.S. If you like this, I found some for sale here.

Tuesday, February 14, 2012

Happy Valentines Day

I don't usually do much Valentine's decorating at my house. However, I did add a few "loving" touches to this mirror. 

Have a great day! 

Wednesday, February 8, 2012

Billy Bookcases!

I'm in love with Billy. Shhhh......don't tell my husband! Ha! Ha!
I spent the last couple of weekends fixing a storage problem for the playroom. A couple of weeks ago I took my annual trip to IKEA and picked up some white Billy Bookcases. I was inspired by
Kate's Billy to Built-Ins.

I knew that I wanted them to look like one bookcase, rather than three separate ones, but mine would be free floating on a large wall, rather than "built-in." 

Kate used the 15" deep bookcases, but my IKEA did not have those, so I had to settle for the 11" ones. I thought the smaller depth might be a problem, but it actually worked out perfectly for us, and saved us some money. The deeper ones were $79 and the ones we used were $49. Score! We used three of these:


The only problem was a gap between the shelves here:


I solved this problem by screwing the shelves together. I was a little worried about the hardware showing, but it's not very noticeable once the shelves are filled:

Next, I added some pine board trim (from Lowes) with a nail gun to hide the gaps and make it look like one unit, instead of three.


I ended up having to mix some paint colors from my collection in order to blend the pine trim with the IKEA white, which is not really white, but more of a cream.

 I am still tweaking the styling of it, but I am content with it at the moment. In the future, I might paint the back/interior, but for now, I am happy with this project. It cost under $200, creates lots of storage, and looks pretty stylish in my opinion.

Check out the cute printable subway art from Anything But Perfect!


Ahhh....organization in the playroom at last!!!

Linking to:


Funky Junk's Saturday Nite Special


Friday, February 3, 2012

Thrift Store Friday

We have this great thrift store close to where I live. They are only open on Fridays and Saturdays. I try to make it out there every Friday, and I almost always find something cute. Today, I picked up this wire basket for $1. It came with the paper and bow. I'm not sure what to do with it yet, but I'll think of something. Valentines Day present, maybe???


Have a great weekend!