I love white. Sometimes I want to paint everything in my house white. But then, nothing would stand out. It would be kind of blah.
About a year ago, I did a project with board and batten on this wall. I painted it white, and then added three framed black and white pictures of my kiddos above it. The wall behind it is an off white color. I wanted to paint it, but it extends all the way down the stairs into the front entrance, which wouldn't look good in any of the colors I liked, so that option was out.
It looked okay, but it needed a pop of color.
This week, I figured out a way to make the pictures stand out without painting the entire wall. Since my frames are square, I just painted a larger square on the wall behind them.
First, I used a level and a pencil to mark where the edges would be and to make sure my lines were straight:
Then I taped off the wall:
I wanted to use the same color paint as the rest of the room, but I didn't have any of that paint left, so I used my highly technical paint mixing skills (e.g. a little of this and a little of that) to whip up a color that was very similar. It looks very gray here (photo taken at night), but it's actully a blue/gray.
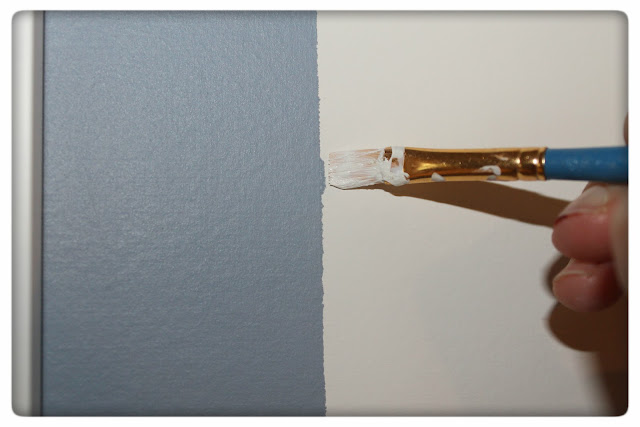
The paint bled a through the tape a little, so I touched it up with a small painter's brush:
Measured by the Heart


Looks great! Love the color you chose. Thanks for the inspiration.
ReplyDeleteSharon @ mrs. hines class
my gosh. that looks so much better. why didn't i think of that.
ReplyDeleteLooks so great. Love it! Following you back.
ReplyDeleteHolly
Wow. Different. Original. Following you and hoping you follow back. Take care, Linda
ReplyDeleteSuch a difference! The pictures really do stand out now. I love this idea. Thanks for visiting my blog and becoming a follower. I am following you back now and look forward to reading your future posts.
ReplyDeleteGreat idea! Makes all the difference!
ReplyDeleteI'm just discovering your blog for the first time today through Thrifty Decorating's Facebook, and I'm sure enjoying your "neck of the blog world"! Thanks for sharing this great idea with us. I love it!
ReplyDeleteIt not only adds color but a perception of dimension. Great idea!
ReplyDeleteI also found you via the link posted by Thrifty Decorating on Facebook.
That makes such a difference, Looks great. New Linky Follower
ReplyDeleteLove this idea! I want to do board and batten walls in my bathroom...was it difficult? This wall just pops now!!
ReplyDeleteThank you again for passing this award on to me...now following you via Bloglovin!
Maggie
www.thehellonheelshousewife.blogspot.com
Hey Maggie! Actually, board and batten was one of the easiest projects I have ever done. All it took was ¼ x 2 ¼ pine trim for battens; small strip for ledge (not sure of dimensions), cove molding (for underneath the ledge), wood putty, miter saw and nail gun. I didn't use a "board" for the backing. It is just the wall painted glossy white. Also, I didn't have to remove the baseboards. The ¼ pine trim sat flush with the baseboards. Since I didn't have any wierd angles, it was a very simple process. It's inexpensive, and makes such a huge statement. I encourage you to go for it!
ReplyDeleteHi, I'm a new Linky Follower. I really like this project. I'm looking forward to more of your posts. :)
ReplyDelete